Tap the + button (the glowing cyan orb) anywhere in the app, enter an amount, pick a category, save. That's the entire core loop.
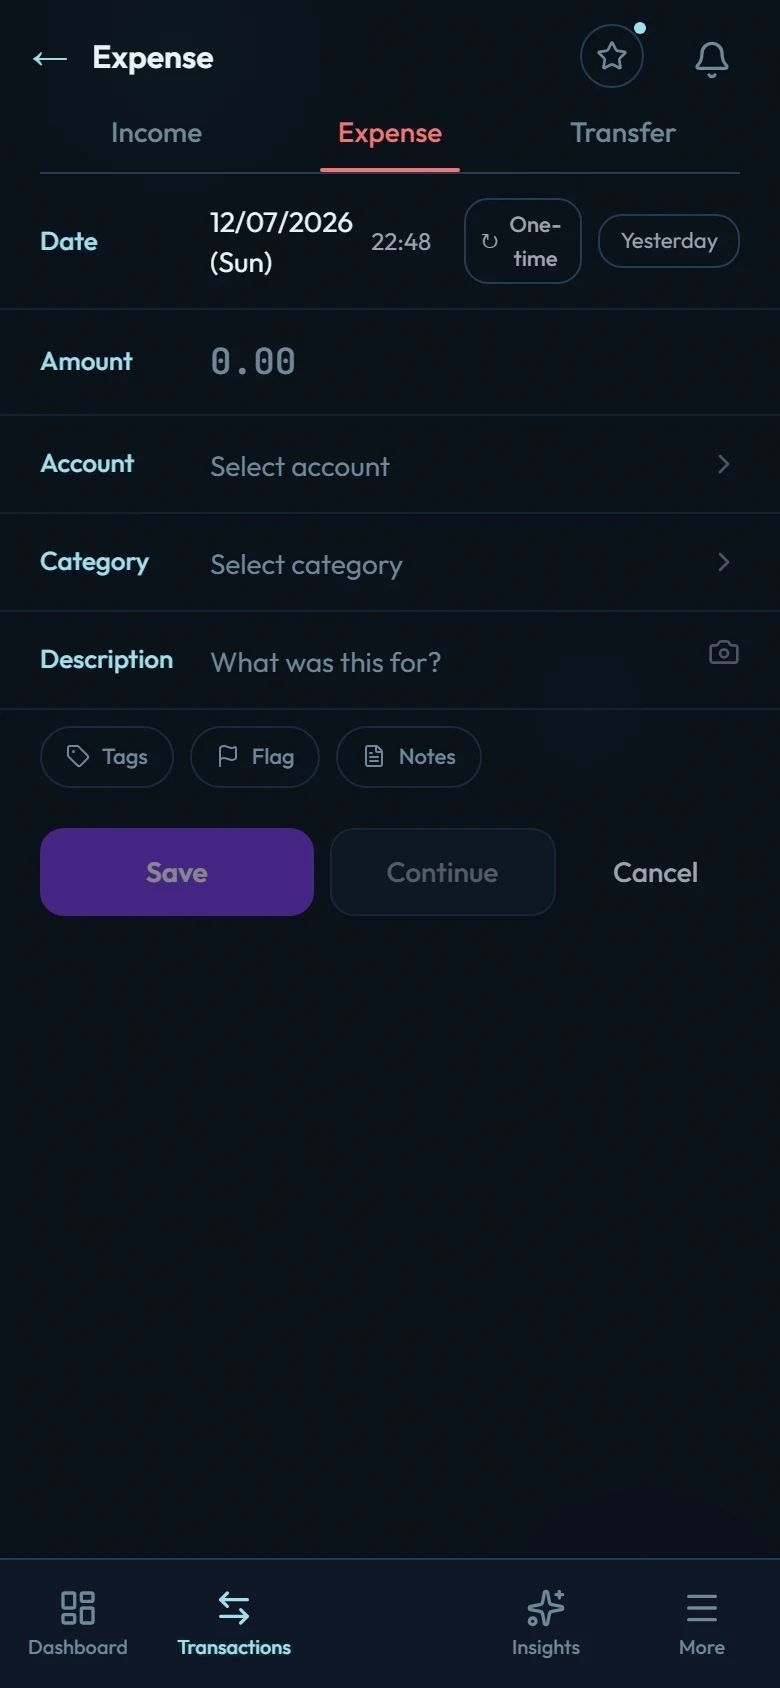
The form, field by field
Type
Expense, Income, or Transfer. Transfers move money between your own accounts and work a little differently: see Transfers between accounts.
Amount
The field doubles as a calculator: type an expression like
12.50+8.40and it resolves the total for you. Handy for adding up a receipt on the spot.Account
Where the money moved. If you have just one account it's chosen for you; with several, you pick which one.
Category
Expense and income categories are separate sets. You can add your own in Settings.
Date
Defaults to today. Backdating is fully supported: recording last Tuesday's dinner on Friday keeps all math correct.
Description, notes, tags
Optional. Notes and tags sit behind small chips under the form so the fast path stays fast.
Bookmarks for repeat purchases
For things you buy again and again (the same coffee, the same commute), save the entry as a bookmark: fill it in, tap the star at the top of the form, then Save current entry as a bookmark. Next time, tap the star and then the bookmark, and the entry fills in, dated today. More in Bookmarks.
After saving
Every save updates your account balance, monthly summary, budgets, and Mutation Path progress instantly. There is no "sync" step. Your entry is the source of truth.
Made a mistake? Open the transaction from the list and edit or delete it; everything recalculates.
Related
- Split transactions — one purchase, several categories
- Recurring transactions — the predictable stuff enters itself